The Drive Shaft boot is also known as the CV joint i.e. the constant velocity joint. The soul purpose of this joint is to transmit power generated by the engine to the wheels. The CV joint is assisted by a set of bearings. These bearings absorb vibrations and transmit rotational energy. This ensures fluid driving and control over the steering.
Drive Shaft boots also functions as a shield. It shields the axle from contaminants such as dirt and water. The axle connects the wheels together. It is essential that the axle is properly shielded during the drive. If the axle fails, the probability of crashing becomes very high.
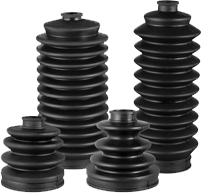
Companies such as Honda that manufacture the drive shafts, manufacture them in two types. The difference is that of material. Rubber and Resin are the two different materials these drive shaft boots are made from.
The Boots should be replaced before they deteriorate. This is a cheap repair. If the degrading boot is not replaced in time, it will affect the drive shaft adversely. Replacing of the complete drive shaft is a relatively very expensive action.
Signs of a damaged Drive Shaft Boot:
In case of a damage to the boot, propagating cracks will start to spill grease. As the boot deteriorates, the crack enlarges with the passage of time and more grease follows. A time will come when black stains will start to appear on the inside of the tyre.
The boot will start producing a sound every time the car turns. The level of the noise increases with the acceleration of the turn. A shudder or side to side shake during acceleration will be the third visible symptom. This is the time when the car owner or driver should know that it is time to replace the boot.
Replacing The Boot:
The replacement of the drive shaft boot is always the most economical choice of action. There is no need to take the car to a professional mechanic as the process is relatively simple.
Once you have all your protection gear ready and the car properly lifted by a jack, the real job begins.
The axle nut and the wheel are to be removed. This can be achieved by unscrewing the lug nuts with a suitable tool.
The wheel is now removed which will expose the steering linkage. A combination of needle nose pliers and a socket wrench will be enough to remove the steering linkage.
Stabilizing bar linkage is next in focus. This bar is to be removed as well. There is no requirement to loosen any nuts or washers. It is removed by simply pulling it from it’s fixed ends.
Further disconnection processes follow. Lower arm bolts, Steering knuckle, Old bands and old boot are to be removed respectively.
All these steps lead to the most important part of the plan of action. A knife is required to cut the funnel so that the ends meet. The new boot is now pushed in the correct orientation. This is followed by the installation of new bands. The excess boot is cut away and the task is achieved.
The plan is now reversed and all the disconnected parts are put back together.
